4:
Ends & Knots
Yarn ends are enemies. They have to be sewn in somewhere and
extra ends make extra work when finishing a garment. Apart from
adding bulk when stitched into seams, they can pop out on the right
side of the garment, making all your hard work look unfinished and
amateur. More ends means more bits to be dealt with, and this is a
lot of work, so eliminate making unnecessary ends.
Having chosen a pattern and then sorted out the tension, you start
the knitting, and even before you have worked stitch one, you can
make the first move to help yourself with the project. If you leave
a long end when casting on, and, in fact, when casting off, or
making colour changes, you can use these long ends for joining
instead of starting a seam with another bit of yarn. You will only
have to deal with one end instead of three. Multiply this by the
number of seams on a garment and you will see how much extra work
and bulk can be avoided as you will eliminate having to deal with so
many ends.
Long ends at colour changes are in the right place and are the right
colour to use for properly matched seams [pic 1,2,3].
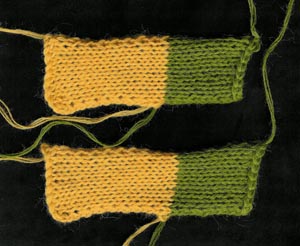
1: Long ends will be used for seams.
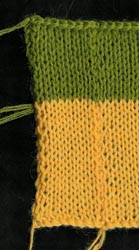
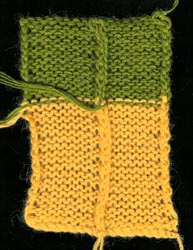
2: (left) Seam joined with matching colours.
3: (right) Back of seam.
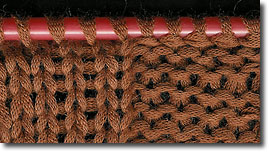
More ends occur with the finish of one ball of yarn and the
start of a new ball. Unless you are knitting in a new area of
colour, always make a join at the end or beginning of a row [pic 4].
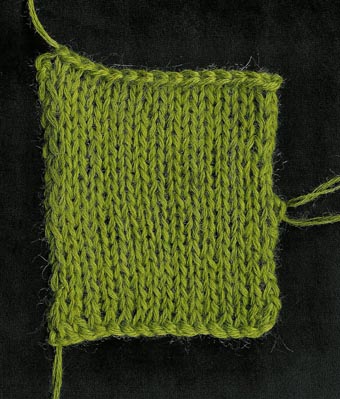
4: Make a loose knot at the join.
If the knitting is a smooth fabric, the join
is almost impossible to hide on the right side unless the yarn is
very thick, but then the join will be very thick. In an attempt to
deal with ends in the middle of the fabric, some knitters rub them
together between their fingers and then keep knitting. Others try to
splice the two ends together. Neither method works well, and
something usually shows on the right side. You really have to unpick
the work back to the beginning of the row, and then join in the
second end. It is worth the trouble.
It’s very annoying when you find a knot in the yarn when you are
half way along, or worse still, near the end of a row. It’s also a
real pain when you run out of yarn just before the end of the row.
Having to unpick all those precious stitches to get back to the
beginning of a row was so aggravating that I decided I had to change
my tactics. Now, at the start of every row, I pull out and check
enough thread to measure about three times the width of the row I am
working, and then I complete the row. It has saved me hours of
unpicking.
If you do come to a knot in the yarn, never keep knitting over it.
Apart from the fact that it won’t hide, it can unravel when being
worn or when the garment is washed. It really is just two ends after
all.
NEXT
PAGE >> chapter
page: 1 | 2 |
3 |