9:
Counting
(cont.)
If you do detect a dropped or extra stitch quickly, you will
have less rows to undo (see
here). If you can’t see the mistake,
hold the knitting against the light and you should be able to spot
it. Don’t pull at the work, because a dropped stitch could turn into
a ladder. Another way that often works is to look at the knitting in
a mirror. Don’t know why it works, it just does for me.
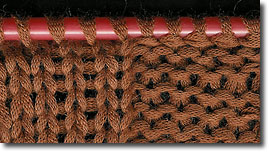
Stocking stitch rows are easily counted on the wrong side of the
work, the purl side. The horizontal ridges that make up the rows are
much easier to count than the stitches on the right side of the
fabric [pic 2].
2: The rows can be counted on the right side of the work, but
the wrong side rows are easier to count.
Gently pull the knitted piece vertically to
separate the ridges, especially with a dark colour, a complicated
pattern stitch or a thick, hairy or confusing yarn. Some yarns are
so difficult to count that it’s best to feel the ridges with your
finger.
If you can’t see to count, place the knitting over something white
or pale, or hold it against a light source. As well as being a help
in counting the rows, all the shapings will show up clearly [pic 3].
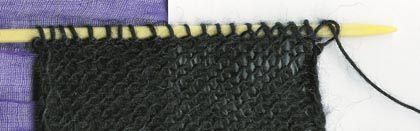
3: The stitches and rows show up against a white
background.
If some yarns defeat your best efforts, and
you find counting is impossible, you must use a row counter or mark
every row on a piece of paper.
Just make sure you count.
Counting the rows is also a great help if you need to keep track of
the wrong or right side. You can do that easily with a marker or a
safety pin, but you can usually be sure that when you knit an odd
numbered row, you are working the right side facing. Another way
that is even easier is to look at the cast-on thread. If it is on
the left side, that usually also means you have the right side
facing. The exception is if you work a pattern stitch that starts
with a wrong side facing row.
NEXT
CHAPTER >>
chapter page: 1 | 2 |