24: Front Bands &
Necks on Cardigans & Jackets
(cont.)
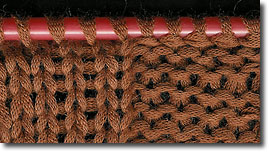
Another method is to make a separate piece,
usually in some sort of rib or garter stitch, so that it will sit
flat when stitched to the edges of the garment. Because the edge
stitch will disappear when the band is attached to the garment, add
one extra stitch on the joining side [pic 18].
18: With an added stitch on the joining side to allow for
the seam, the sequence of the rib pattern is correct.
Knit these bands firmly, because when
working short rows there is a tendency to knit loosely, and the
bands could end up longer than the garment.
If the knitting has been worked, hem bands and all, with one size of
needles, count the number of rows, including any band, from hem to
neck. If there are to be buttonholes, divide the number of
buttonholes (see here) into the number of rows.
Continue knitting the band until it is long enough to fit along both
fronts and the neck. Don’t cast off, as you may need to knit more
rows or take some off. You could calculate the exact number of rows
needed, but that is a lot of counting and this way is easier.
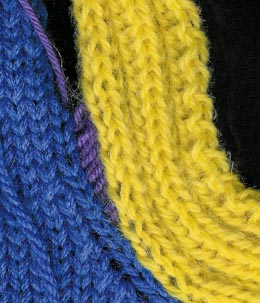
With the band still on one needle, and with the right side facing,
start from the hem on the buttonhole side, either right or left.
Join the band to the garment, matching row to row between the first
and second stitches from each edge [pic 19].
19: Start joining the band to the garment at the hem. As
the needles used for the trim and the garment are the same size,
match row to row.
At the start of a round neck, gather five or
six rows of the band into the first stitch on the corner of the neck
to allow the right angle turn of the band to sit flat. The corner is
not as sharp as when you work a mitre [pic 20].
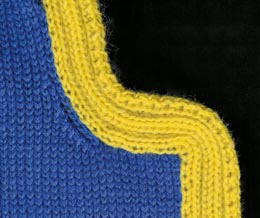
20: With five or six rows of the band gathered into the
corner stitch of the garment, the band will sit flat.
By now you should be a dab hand at joining
stitches to rows, and so you should sail through the next part, the
neck.
If you are joining the band to a round neck, join three rows to
three stitches along the horizontal edge next to the corner and then
skip every fourth row along the front of the neck and the back of
the neck. Match row to row at the side of the neck and along the
edge of the shaping rows.
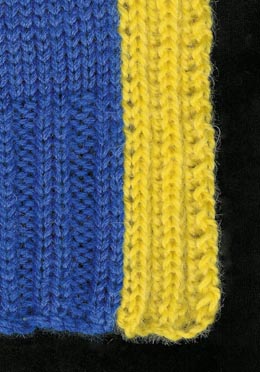
To attach a separately knitted band to a V neck, join row to row
from the hem to the start of the V, then skip every fifth row of the
band to allow for the diagonal angle of the V neck edge [pic 21,22].
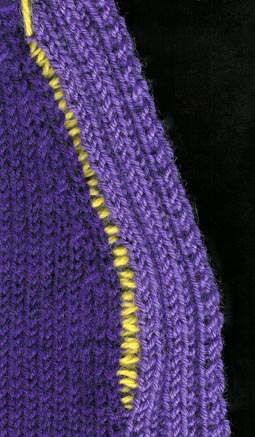
21: (left) To join a separately knitted band to a V
neck, join row to row from the hem to start of the V. Then to allow
for the diagonal angle, skip every fifth row on the band.
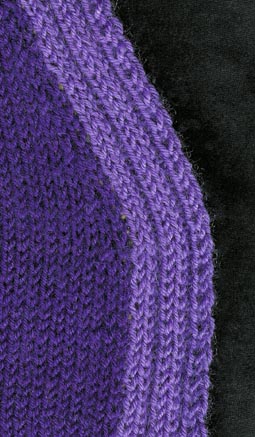
22: (right) The band has been attached, and sits
perfectly.
When hem bands are knitted with a smaller
size needle than that used for the rest of the garment, change the
row to row ratio. Because the hem band rows knitted on a smaller
size needle are shorter, when attaching a front band which has been
knitted on larger needles, skip every fourth row at the side of the
hem band, then continue as previously described.
---
Bands do require concentration and counting,
and skipping or missing stitches or rows when joining or picking up
stitches, but the perfect finish you will achieve is worth the
effort. It is easier to calculate and follow all the stitch to row
ratios than to have to fiddle around trying to fix up badly worked
bands.
NEXT CHAPTER >>
chapter page: 1 |
2 | 3 |
4 | 5 | 6 |